I'm about to create the control rig for my character's arms. Like the legs, it's going to be based off IK solving, though it's going to be a bit more complex. Unless you're making a dancing game or a fighting game, your characters are unlikely to have as complex movement in the legs as in the arms, especially when it comes to twisting. I'm going to need to test my shoulder controllers with the arm straight (as in bind pose) and with the elbow bent. And I'll probably want to go back an forth between those, which is I'll create a character set.
A character set is little more than a bunch of keyable attributes that are grouped together so you can set keys on them more easily. Creating a character set allows you to store those attributes' value in what is called a pose. You see where I'm going...
Before creating the character set, I'm adding an IK handle (I've used an RP solver) on the left arm (from below the shoulder to the wrist) and I parent that to a controller. That controller is aligned with the wrist joint.
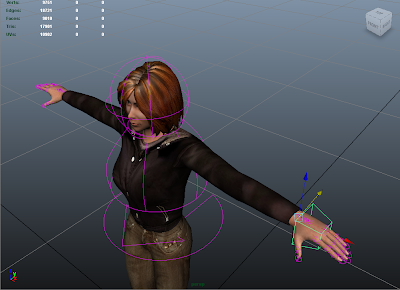
Obviously, the hand controller itself is parented to the upper body controller.
I am now ready to create my character set. It's actually quite simple to do. Select everything you want to be part of the character set (in my case, I've just selected the controllers, but it might be wise to include the actual skeleton as well), and then go in Character > Create Character set (click on the small square to get the options). You should see the following window:

I don't remember if those are the default settings, but the important bits are:

There we go. Now we can start doing interesting things. First, I'm going to create a pose with the character in bind pose, so no matter how much I play with the rig, I can always go back to the neutral position.
Creating a pose is very easy:
To see the list of poses you've created, you'll need to go in the Visor (Window > General Editors > Visor). There's a tab called "Character Poses" which will list all the poses you've made. To apply a pose on your character, right click on the pose, and select "Apply".
I'm going to create another pose with the elbow bent 90°, so that the forearm is facing forwards. Like so:

I've created custom shelf shortcuts to rapidly switch back and forth between the to poses. I am now ready to carry on with the rigging of this arm.
Before creating the character set, I'm adding an IK handle (I've used an RP solver) on the left arm (from below the shoulder to the wrist) and I parent that to a controller. That controller is aligned with the wrist joint.

Obviously, the hand controller itself is parented to the upper body controller.
I am now ready to create my character set. It's actually quite simple to do. Select everything you want to be part of the character set (in my case, I've just selected the controllers, but it might be wise to include the actual skeleton as well), and then go in Character > Create Character set (click on the small square to get the options). You should see the following window:

I don't remember if those are the default settings, but the important bits are:
- Tick the "Include hierarchy below selected node" box.
- Choose the appropriate attributes to include. I've excluded scale, as scaling skinned skeletons tends to go wrong (if working at all).

There we go. Now we can start doing interesting things. First, I'm going to create a pose with the character in bind pose, so no matter how much I play with the rig, I can always go back to the neutral position.
Creating a pose is very easy:
- Put your character in the desired pose.
- Select the character set.
- Go in Animate > Create Pose (and the little square to get the options).
- Type the name of the pose, click "Create Pose".
- ???
- Profit.
To see the list of poses you've created, you'll need to go in the Visor (Window > General Editors > Visor). There's a tab called "Character Poses" which will list all the poses you've made. To apply a pose on your character, right click on the pose, and select "Apply".
I'm going to create another pose with the elbow bent 90°, so that the forearm is facing forwards. Like so:

I've created custom shelf shortcuts to rapidly switch back and forth between the to poses. I am now ready to carry on with the rigging of this arm.
Hello, I've attempted this and all seems fine but whenever I go to key an IK handle in a character set it immediately bounces back to it's default position when I key the frame - do you know why this may be?
ReplyDeleteMaybe you've set a key by accident?
Delete